If you want to learn how to make sugar wax at home you are in the right place because I have 3 foolproof DIY recipes to share with you.
If you are still using a razor to get rid of unwanted body hair or going to a beauty salon to get traditional waxing, you should read this.
You can make your own sugar wax at home with natural ingredients from your kitchen.
And the best benefit of all is the money you are going to save.
If you go to the salon every month, making your own DIY sugar wax at home is going to save you serious bucks.
Please note that this post contains affiliate links. It means that if you buy through my links I will receive a small compensation at no extra cost to you.
What Is Sugar Wax?
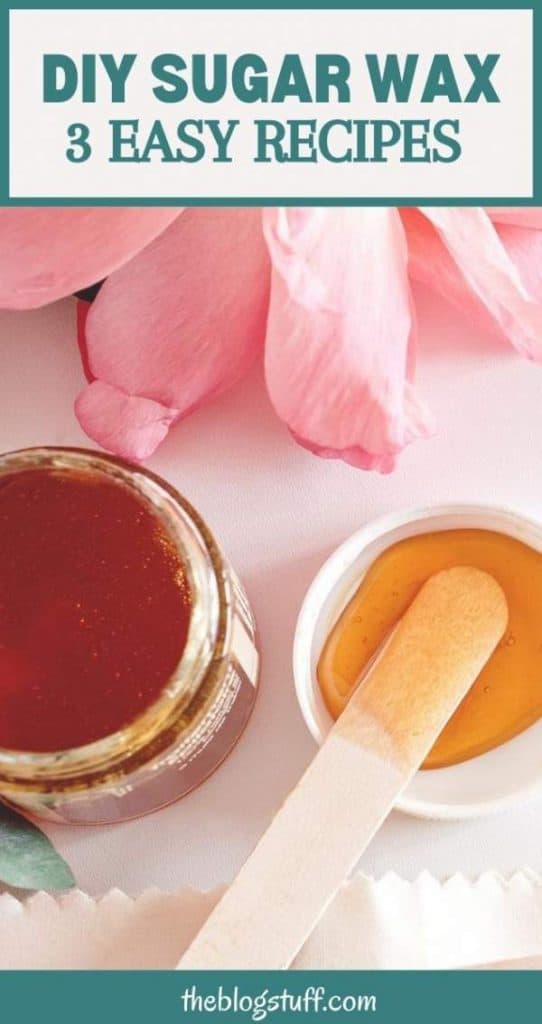
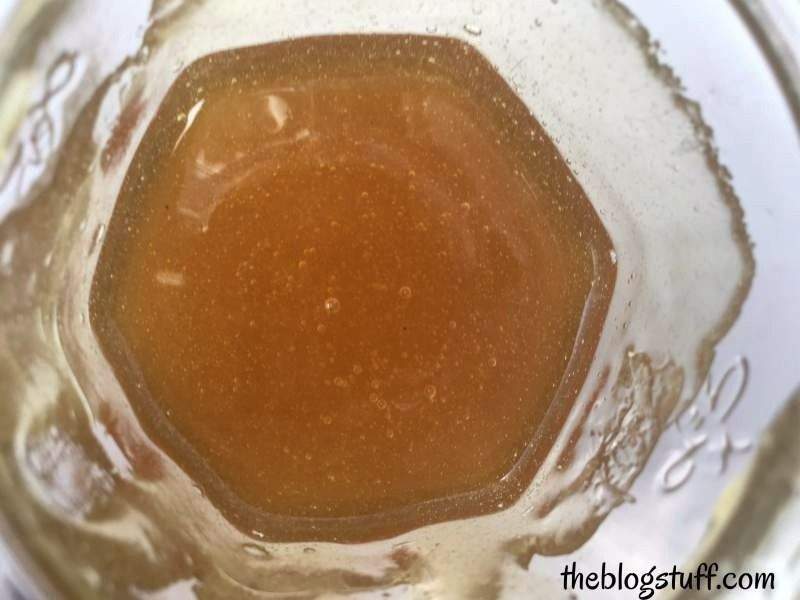
It is a natural way of removing the body and facial hair using sugar, lemon, and water paste. It is very similar in texture and color to honey.
People usually sugar wax at home because is more convenient and cheaper but some beauty salons are offering this treatment too.
It can be used in all skin types, even sensitive skin.

7 Sugar Wax Tips for A Perfect Recipe (Important)
Before learning how to make sugar for waxing, I’m going to share a few sugar wax tips that will make your sugaring experience easier.
1. You can use white or brown sugar for the recipes.
I like to use white sugar for mine because I find that the wax gets too dark when I use brown sugar.
2. To prevent burning the sugar set the heat to medium until starts simmering and then to low. (I set mine, in an electric stove, to 4 to begin with and then lower it to 2)
3. As soon as the golden brown color (similar to honey) begins to show, remove it from the stove.
This can take several minutes, depending on the intensity of the heat.
4. Make sure the container you use to transfer the wax is heat resistant.
5. Allow the mixture to cool and always check the temperature before applying it. In case you burn yourself, pour cold water into the area.
You can also rub ice or apply aloe vera gel, cold cucumber, or cold milk.
6. It is more difficult to get it right the first time, especially if you are a beginner. Just try again if it doesn’t work.
You will become an expert in no time!
7. If you are not going to use it straight away, keep it covered in the fridge. When you decide to use it put it in the microwave until it melts.
Wait for it to cool and it is ready to use.
So, let’s get started!
How To Make Sugar Wax At Home: Top 3 Favorite DIY Sugaring Recipes
Here are 3 of my favorite homemade sugar wax recipes.
And just in case you are not a fan of lemon, I have included one that works without it.
Below the recipes, you can find how to apply sugar wax, aftercare tips, and how to wash pots after making sugar wax.
1. Homemade Sugar Wax Recipe with Lemon Juice (with pictures)
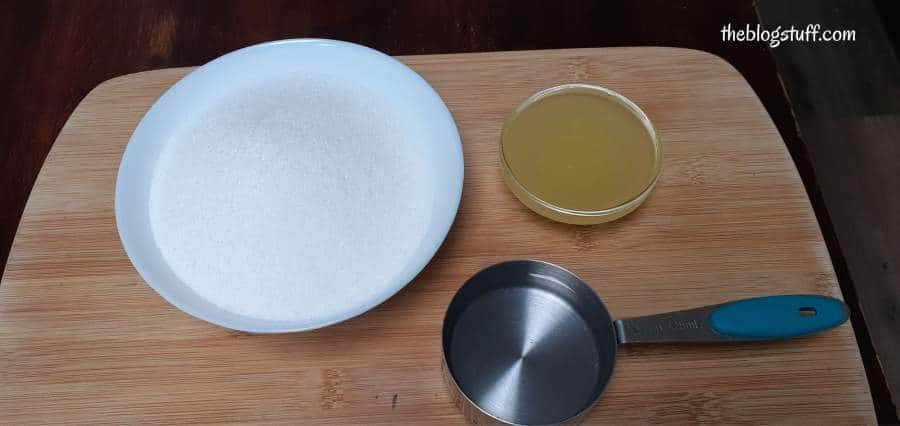
Sugar wax ingredients you need:
- white sugar – 1 measuring cup (250 ml
- water – 2 tablespoons
- fresh lemon juice – 2 tablespoons
- spatula
- heat resistant container
- a medium-sized saucepan
I always recommend using an old pot or pan to make the sugar wax just in case it gets burnt.
At the bottom of the article, you will find tips to clean saucepans stuck with sugar wax.
Sugar wax preparation:
1. Get the ingredients ready.
2. Place the sugar, water, and lemon juice in a non-stick pan, turn on the heat, and stir.
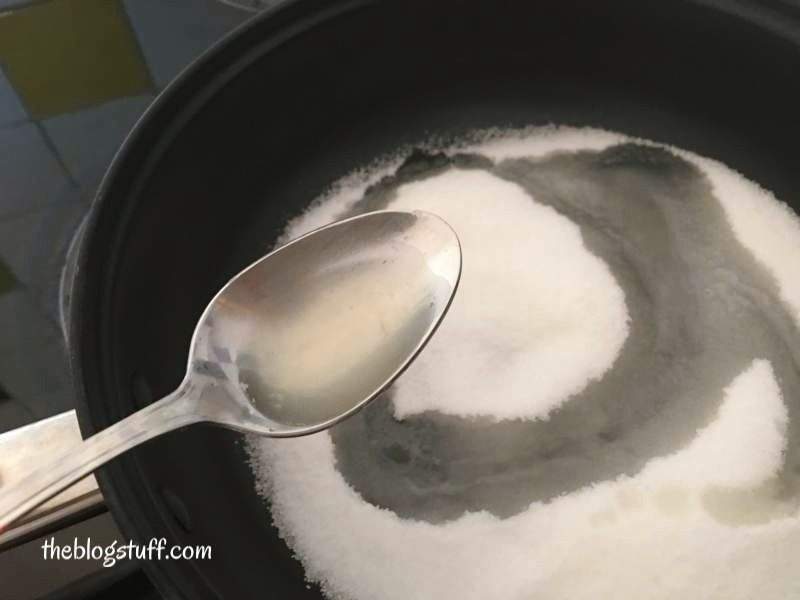
3. Set the heat to medium so that your wax doesn’t burn.
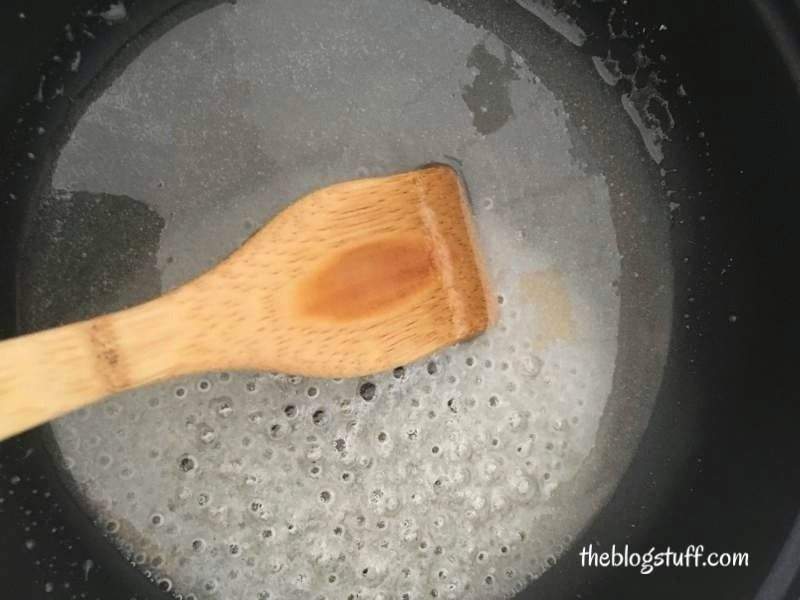
4. Keep stirring.
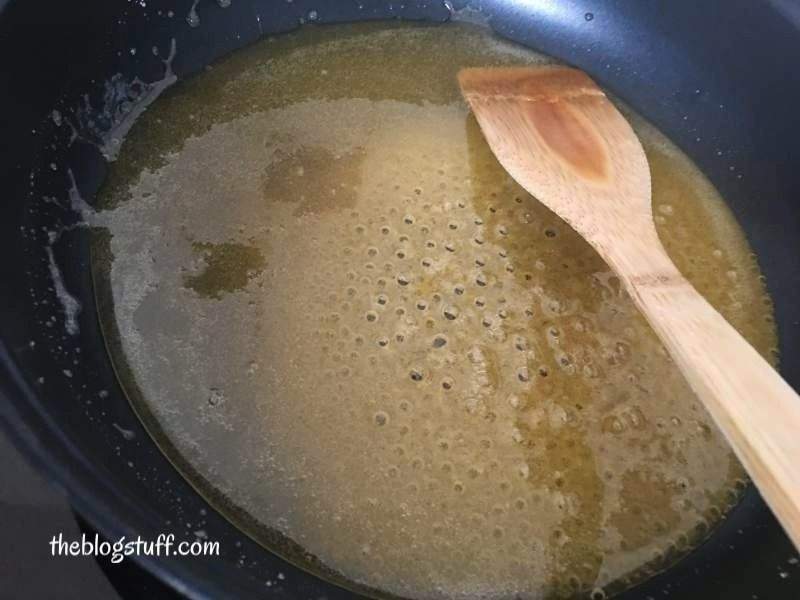
4. Reduce the heat intensity, but keep stirring until it begins to turn golden brown.
The time it takes for the sugar to change color varies depending on heat intensity, so make sure you keep an eye on the wax and wait for the caramel color to appear.
5. As soon as the sugar begins to caramelize, remove it from the heat and allow the sugar wax to cool in the same pot.
Don’t leave it longer because it turns black.
It is better to remove it earlier because you can always put it back on the heat, but you would have to throw it and start it again if it burns.
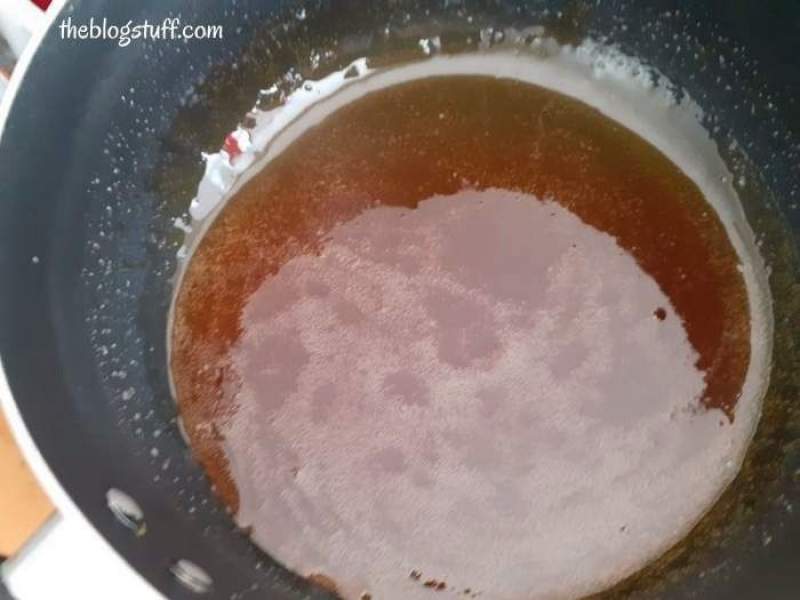
6. If you intend to use the sugar wax straight away, wait for it to cool down before applying it to the skin.
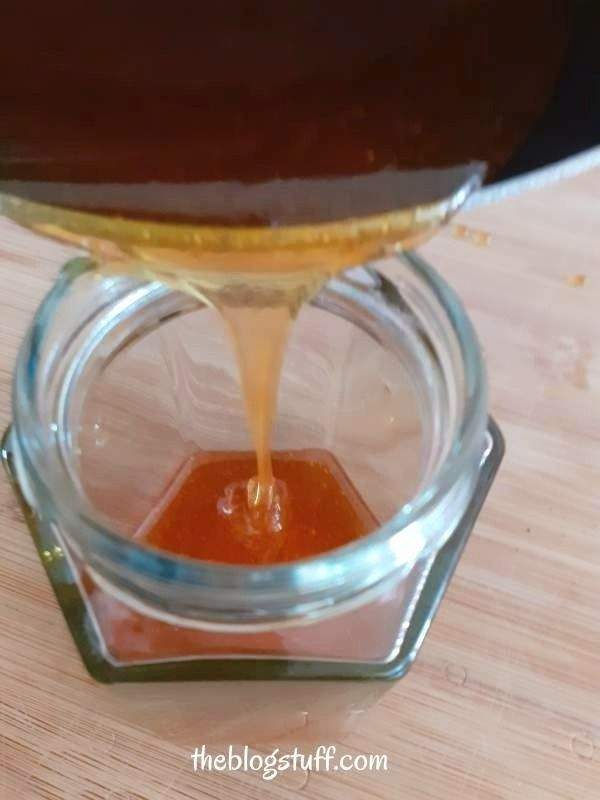
If not, place the sugar wax into a heat-resistant container and store it in a cool place. Next time you want to use it microwave it for a few seconds until it melts.

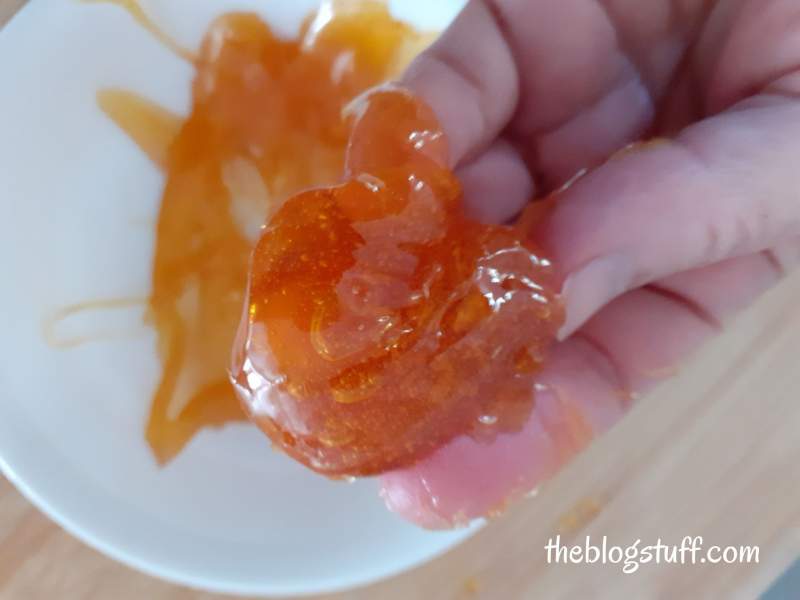
Next, DIY sugar wax recipe using lime.
2. Sugar Wax Recipe With an Alternative to Lemon Juice

You will need:
- white sugar – 1 measuring cup (250 ml)
- water – 2 tablespoons
- lime juice – 2 tablespoons
- saucepan (medium size)
- spatula
- heat resistant container
How to make it:
Place the sugar, water, and lime juice in a non-stick pan and turn on the heat. Stir.
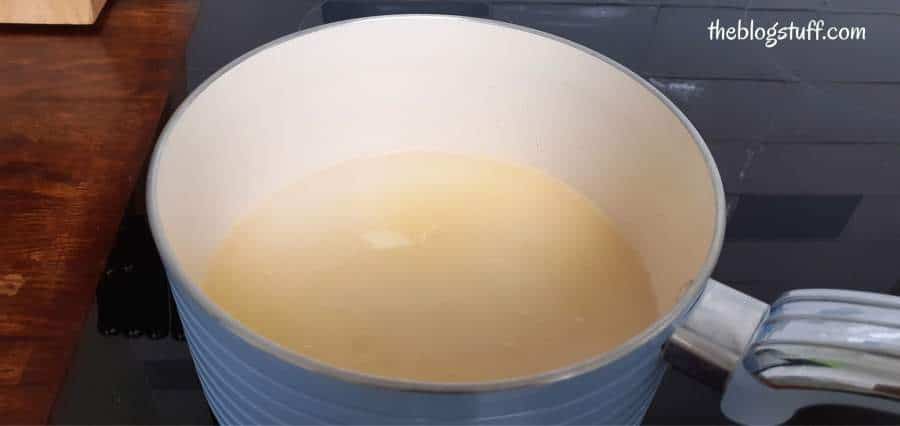
Set the heat to medium heat so that your wax doesn’t burn.
Keep stirring until it starts boiling then stop stirring.
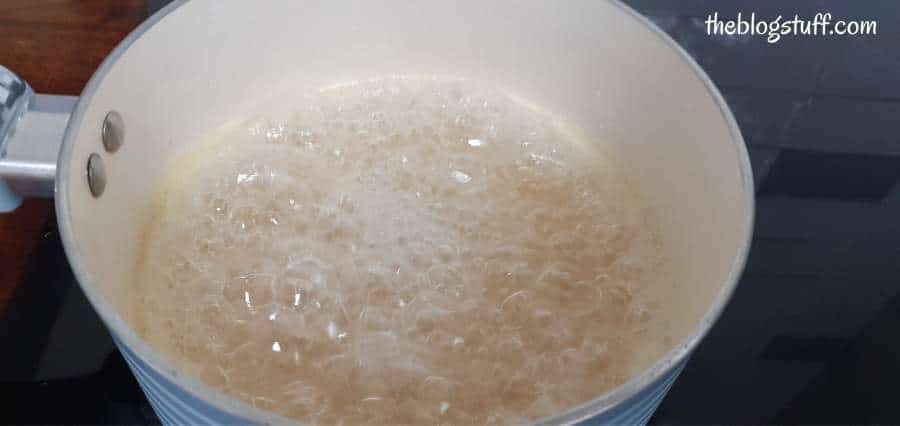
Let the mixture boil until it begins to turn golden brown.
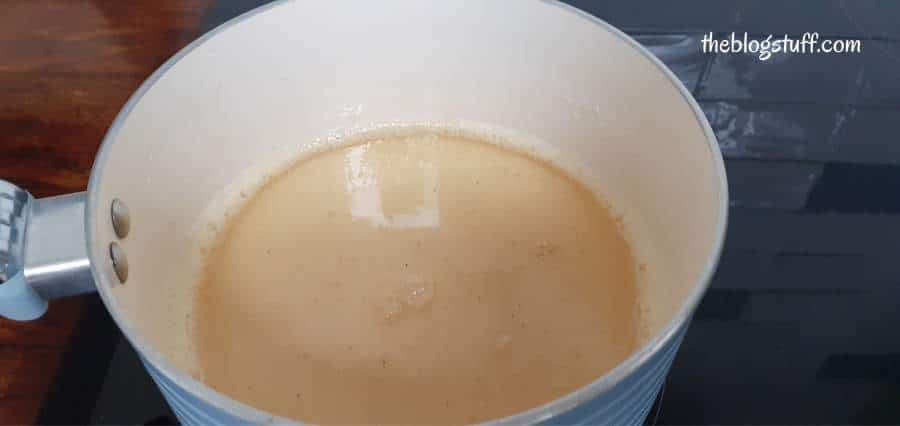
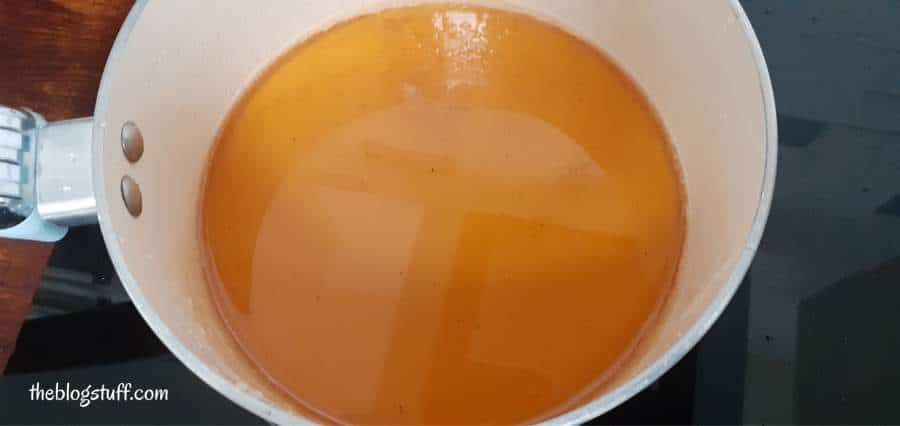
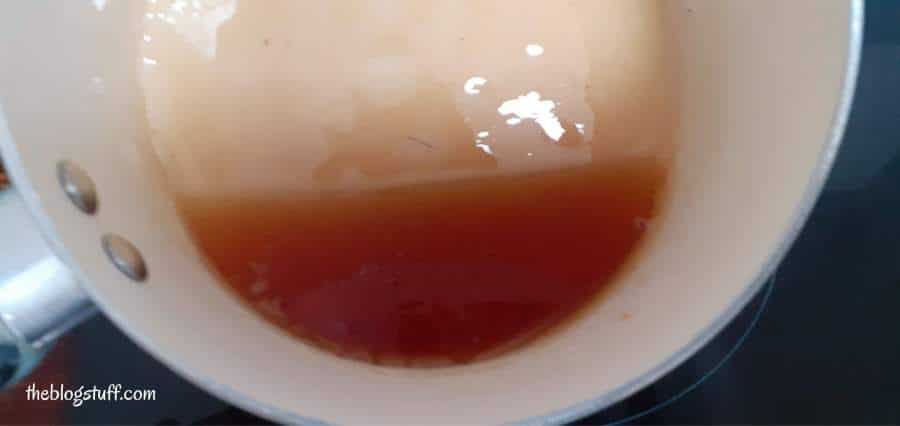
Turn off the heat to allow the sugar wax to cool.
If you want to speed up the cooling process, pour the sugar wax into a bowl with very cool water.
This step is also great to check the consistency of your sugar paste. If the sugar wax consistency is too soft put it back in the heat and cook it a bit longer.
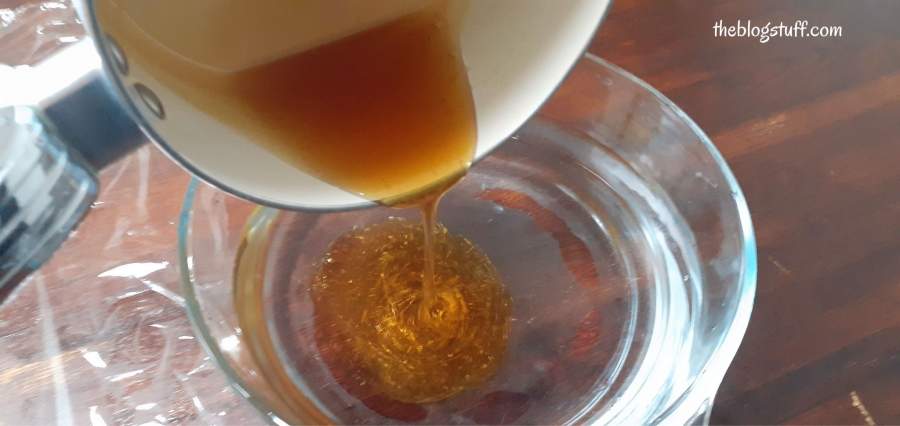
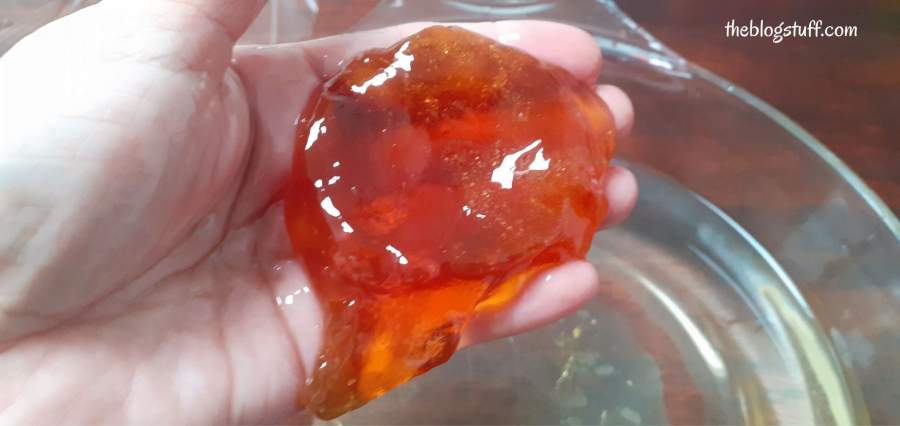
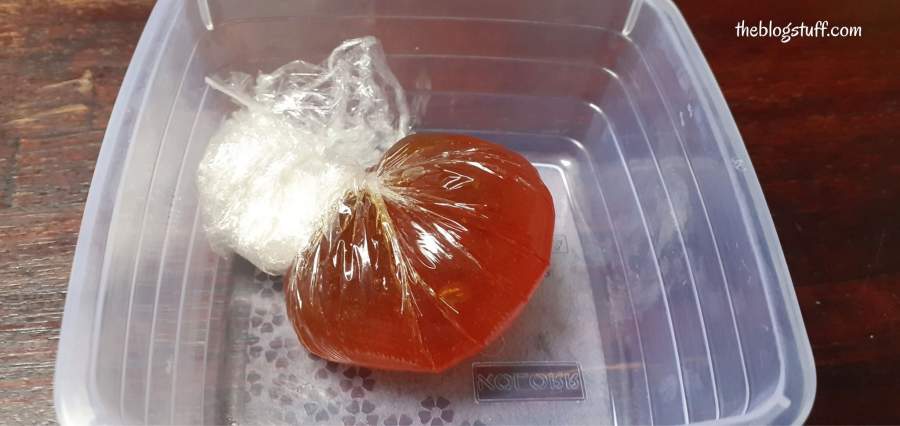
When the sugar wax reaches the desired texture, wrap it in plastic and keep it in a container. Store it in a cool, dry place.
Next, DIY sugar wax recipe with apple cider vinegar or white vinegar.
3. How To Make Sugar Wax Without Lemon Juice
Some people have tried to make this recipe and it didn’t work for them.
All I can say is that if you follow the step-by-step instructions it should be fine.
Don’t despair if it does not work the first time or even the second time, remember that practice makes perfect.
FIND ON THE BLOG STUFF: 50+homemade skincare and beauty recipes
The Best DIY Sugar Wax Recipe Without Lemon
Ingredients and utensils:
- white sugar – 1 measuring cup (250 ml)
- water – 2 tablespoons
- apple cider vinegar or white vinegar – 2 teaspoons
- medium-sized saucepan
- spatula
- heat resistant container
How to make your own sugar wax recipe
Place the sugar, water, and vinegar in a non-stick pan and turn on the heat. Stir.
Make sure the heat is set to medium to prevent the mixture from burning. Let the mixture simmer and keep stirring until it begins to turn golden brown.
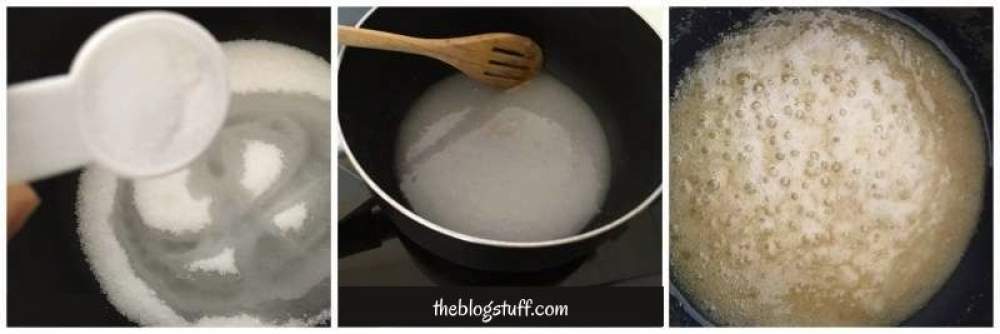
It takes several minutes for the wax to be ready but always keep an eye on the color because it varies depending on the intensity of the heat.
The constant stirring will help you tell if the wax has the right consistency.
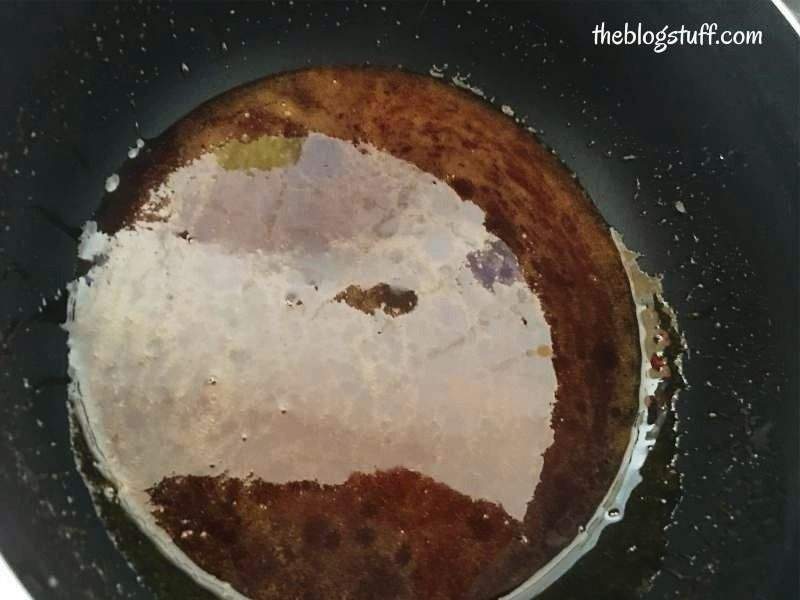
Turn off the heat and as it cools, pour it into a heat-resistant container and store it in a cool place.
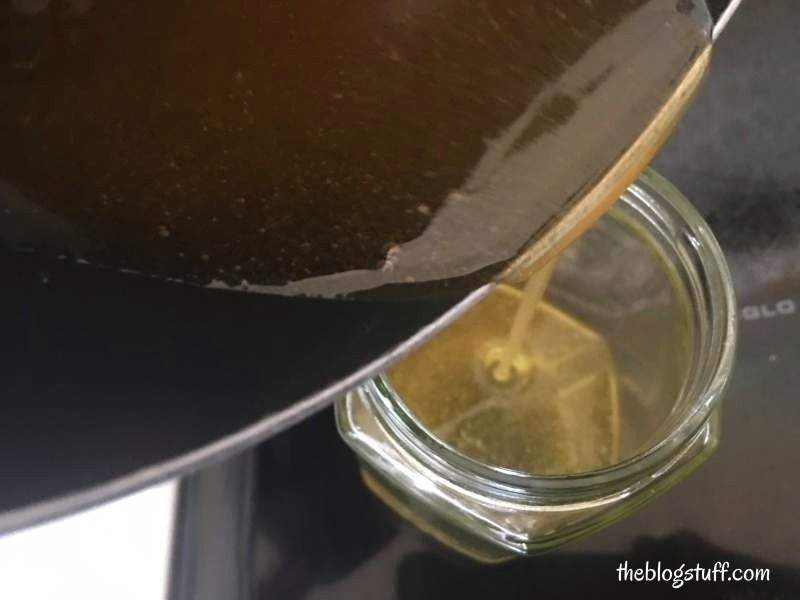
Heat it in the microwave every time you want to use it (a few seconds until it melts).
# Popular DIY SKIN CARE Articles:
If you are a fan of natural homemade recipes, you will enjoy making and using these DIY beauty recipes:
- DIY cuticle oil recipes
- DIY essential oil bath bombs recipes
- homemade lotion bars with Shea butter
- DIY Japanese rice face mask
- DIY lemon sugar scrub recipe
- 3 easy homemade facelift masks
If you want to know how to make sugar wax in the microwave, check out this video. It is a faster way to make sugar wax using the microwave instead of the stove.
Before You Wax (Important)
- Check the wax before you start to make sure it is not too hot.
- Make sure you are not allergic to any of the ingredients used. Perform a test on a small part of the skin.
- It is important to exfoliate before waxing. Do it two days before your session.
- Don’t take a shower for 2 hours before waxing, as this might make the skin extra sensitive.
- Don’t use it if you have broken skin, a skin rash, varicose veins, or are allergic to any of the ingredients.
Q: How long does the hair need to be?
Source
A: 1/2″ – about the length of a grain of rice. Depending on how fast your hair grows, that is usually 10 – 14 days after your last shave.
How to Apply Sugar Wax at Home
If you want to know how to use sugar wax follow the next steps.
1. Apply baby powder to the area you want to wax. This will get rid of any moisture that might prevent the wax from adhering to the hair.
2. Scoop some of the sugar wax and form a mound the size of a golf ball. Apply a thin layer of wax on the skin surface, in the opposite direction that your hair grows.
3. Holding a sturdy wooden wax applicator stick or your hands, spread the wax evenly on the skin to achieve a thickness of about a quarter of an inch.
4. Hold the skin tight and quickly rip the wax off in the direction of the hair growth. This can be done using your hands or cloth strips.
5. If the sugar wax paste is too runny, you need to simmer it a bit longer until it thickens.
On the contrary, if it is too hard or sticky, try adding a bit more water while simmering until you get the consistency you want.
If you have overcooked the sugar wax, you need to throw it away and make a new batch.
6. Check for any hairs that didn’t come off and get rid of them using tweezers.
7. To get rid of the stickiness after waxing, soak a cotton ball in olive oil and rub the area with it until smooth.
You can also use warm water.
Remember you can use the same ball of sugar wax up to 3 or 4 times before discarding it.
Sugar Waxing Aftercare Tips
# It is important to soothe your skin after a waxing session.
This will help to prevent irritation, bumps, and ingrown hairs. I recommend applying some cold-pressed aloe vera gel to the post-waxed skin.
# Aloe vera has anti-inflammatory properties that will keep irritation away.
It is also an awesome natural moisturizer. Don’t use regular lotion or perfume on the skin after waxing.
# Avoid going out in direct sunlight immediately after waxing. Also, consider taking a day off your regular exercise routine to keep sweat off the skin.
So, there you have it!
Washing Saucepans After Making Sugar Wax
Your saucepans will be sticky and difficult to clean and eliminate when the remaining sugar wax hardens.
There are two ways I use to clean them.
1- Cover the inside of the saucepan with very hot water and a trickle of washing-up liquid. Leave it for a while and wash it as usual.
2- If there is still stubborn wax, pour some water into the pot and heat it up. This will melt the remaining wax. Throw the water and wash the pot.
These homemade recipes are 100% natural and good for your skin. They are also very pocket-friendly.
And one last thing, homemade sugar wax can last for a few months if stored covered in a cool place or in the refrigerator.
Popular DIY Sugar Wax Questions & Answers
1. Can You Make Sugar Wax Without Lemon Juice?
If you’re sensitive to lemon juice in your sugar wax recipe, or simply don’t like it, you can swap this particular ingredient out for another acidic liquid, such as lime juice.
If you’d rather not use citrus juice at all, you can substitute these for something else, such as apple cider vinegar.
Some people aren’t keen on the aroma of vinegar or acids in their sugar wax and so to combat this you can add a couple of drops of a soothing essential oil such as lavender or rose.
2. How to Make Sugar Wax Thicker
If your sugar wax isn’t thick enough, it might be that you’ve undercooked it.
When it’s initially made, tip some of it out into a small container.
Stir it and watch as it starts to cool down. It should thicken.
If it doesn’t, simply return it to your pot, put it back on the heat, and continue to boil it gently for a little longer, just giving it thirty seconds until it reaches the desired consistency.
3. How to Make Sugar Wax Cool Faster
It’s always best not to rush cooling your sugar wax, as you can run the risk of your mixture being too runny, or too hard.
If you really do need to cool your mixture down quickly so you can use it faster, then once it is cooked, set it aside in a heatproof container for a few moments.
Next, place it into the fridge for roughly fifteen to twenty minutes.
Once it is lukewarm or at room temperature, it is safe to use.
4. How to Make Sugar Wax Dry Faster
As per the previous point, it’s a good idea to take your time when using sugar wax.
You want the process to be easy and not painful.
To get your sugar wax to dry faster once it is applied, direct a little cool air to it from a fan.
Go carefully and steadily with it, and once you feel it is dried enough, go on to quickly remove it.
5. How to Make Sugar Wax Hurt Less
There are a good few hints and tips to make sugar wax hurt less.
Before you attempt to wax, you could apply a small amount of numbing cream to the area which is going to be de-fuzzed.
This is particularly useful for smaller areas such as your underarms or upper lip, but perhaps not so good for your legs!
Some people find taking a mild, simple over-the-counter painkiller like aspirin or paracetamol an hour before you try, can help.
When waxing, it’s important to make sure you pull the skin in the right direction to minimize pain.
Make sure you apply the paste against the direction of hair growth and remove it quickly and firmly in the direction of hair growth.
It sounds counter-intuitive but the faster and harder you pull the wax, the less pain and redness will occur.
If in doubt, you could always ask a trusted friend or relative to help you.
6. How to Make Sugar Wax Harden Faster
It typically takes about thirty minutes or so for sugar wax to harden and get to a malleable consistency that will be right to remove hair.
It’s better to leave it to cool down and harden slowly so that it reaches the desired consistency optimally.
It’s possible to cool it down a little more quickly by leaving it in a cooler place in the house to set it a little faster.
You can also place it in the refrigerator for a few minutes to start the hardening process off too.
Keep a careful watch on it to make sure it doesn’t harden too quickly.
DIY beauty Christmas recipes to make for gifts:
- how to make Christmas soap
- DIY Christmas bath bombs (6 recipes)
- DIY Christmas sugar scrub recipes
- 21 DIY Christmas beauty gifts

If you have any questions about these sugar wax recipes leave a message below.



My sugar wax is the right color and it seems as it’s the right consistency but- I can only use it with strips I can’t form the ball. Any suggestions? Thank you!
H Jaxx,
I’m not sure what you are doing wrong, but consistency is important. Before thw sugar wax gets hard place it on cold water to stop it from cooking and see if you can make a ball inside the water. Please refer to the images on the article.
Thanks for stopping by!
If you had to give an estimate on how long it should cook for give or take a cpl minutes what would you say?
Hi,
It is difficult to say because it depends on several variants. The best thing is to keep experimenting with the sugar wax recipe until you get it right. To give you an estimate, it could be from 7 to 10 minutes. I hope this helps.
i made my wax the 2nd way and its not hardening its just a hot sugar liquid and i was thinking of putting some cornstarch in it but i hesitated so what do i do now?
Keep boiling the sugar wax until it thickens. I have never made the recipe using cornstarch so I can’t recommend it.
My sugar wax is not changing to the honey-like colour you describe. It is just staying light yellow.
You probably need to cook the sugar wax longer. Leave it until it begins to show a caramel/honey color.
Can I use sugar wax in a waxing pot?
Hi,
I haven’t tried it myself, but I have seen some people transfer the sugar wax (once is ready) into a wax warmer to keep it warm during the application. Not sure if you meant this, though.
Thank you so much! I’ll be trying this recipe today and sugar waxing tomorrow.
Thank you! Let me know if you have any issues.
What do you use to pull the hair off if you don’t have strips
You can use your fingers, just make sure to pull back against the direction of hair growth.
When do I know to take it off medium heat and go to low?
I wait until it starts boiling and then I reduce it to low heat. When the sugar wax begins to show a light honey color I take it off the stove. I hope this helps.
My wax is the right color and consistency but it is too sticky to form a ball. Is it overcooked or undercooked?
Thanks
It could be that you haven’t cooked it long enough.
I made sugaring wax for months, then I got too big and pregnant that I couldn’t reach my legs lol. Ever since I had my baby, every time I make it it doesn’t stay gooey. It get hard like a sucker as soon as I put it on my skin. I can figure out what I am doing wrong/different from before when I used to make it. Any ideas what I could be doing wrong?
You could be overcooking the sugar wax. I’m going to update the post soon, and will answer some questions I’m getting.
Didn’t work for me. Tried it several times. ????
Sorry about that. Try to find a video where you can see how it’s done.
My sugar wax doesn’t remove hair
The problem could be that your hair is not long enough or that you have overcooked the sugar wax.
How I should put it ? Can I put it with paper or just rub it?
To apply it you can use a popsicle stick or your hands if you prefer. I give a few tips after the recipes on how to sugar wax at home.
The wax is not sticky at all. Why is my wax so hard
You are possibly overcooking it. Making sugar wax is many times a case of trial and error. Try again, but this time remove the sugar wax from the heat earlier.