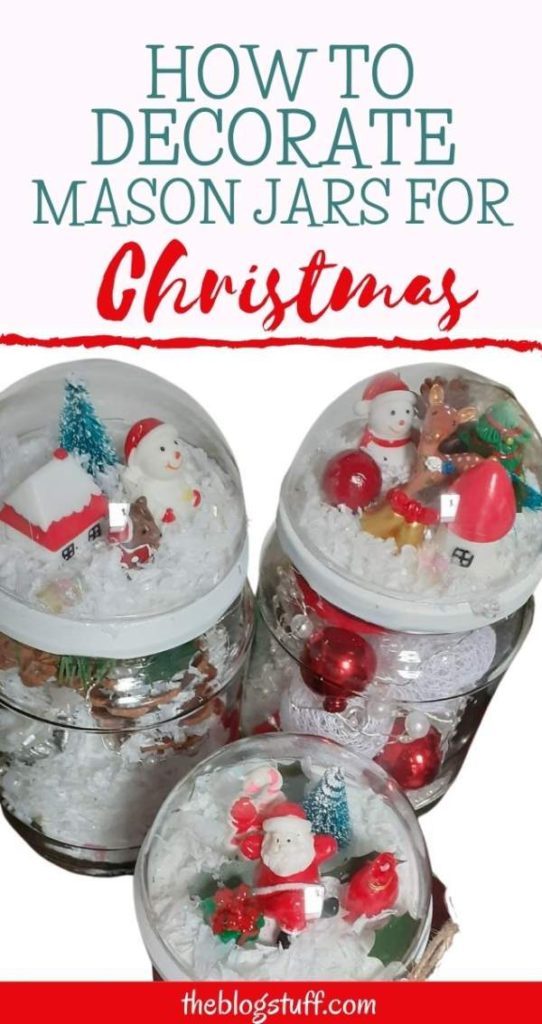
Decorating Mason jars for Christmas is a fun creative craft activity that will keep you and your kids entertained for hours.
In this article, I give you some ideas you can use to decorate glass jars and incorporate them into your yearly holiday decorations.
You can personalize the jars to suit your taste and really make them stand out.
There is no need to spend much on this craft, just recycle the jars you have at home and use last year’s Christmas ornaments.
Please note that this post contains affiliate links. It means that if you buy through my links I will receive a small compensation at no extra cost to you.
Below there are 3 Mason jar Christmas ideas:
- Decorating Mason jars with Christmas trees and fairy lights
- DIY Mason jar lid snow globe or dome
- DIY frosted glass jars (glue and salts)
Decorating Mason Jars For Christmas
What I love about this craft is the flexibility on what jars you choose, they could be recycled from jam or something else you purchased and decided to turn what’s left behind into a warm, visually appealing craft.
My suggestion is to go with wide-mouth jars, as it will make the process easier.
Another idea is to choose tinted jars if you want to add color without using food coloring.
Since this is such an inexpensive craft, I highly encourage you to experiment with different jars, decorations, and coloring to see what you can create!
All the glass jars I’m using for this craft are recycled but you can use Mason jars if you want to.
1 (a). Mason Jar Christmas Tree With Lights
This Christmas tree in a jar craft is fun, and simple, and can be done with any size of mason jar.
All you need to do is buy miniature Christmas trees, fairy lights, and a pack of white artificial snow. You can also add a string to the top of the jar for decoration.
Materials
- Mason jar or any other glass jar (I’m using a big coffee glass jar)
- miniature plastic Christmas trees
- artificial snow or salt (I like to use Epsom salts)
- round styrofoam (optional)
- a string of small battery-operated fairy lights
- super glue
Directions
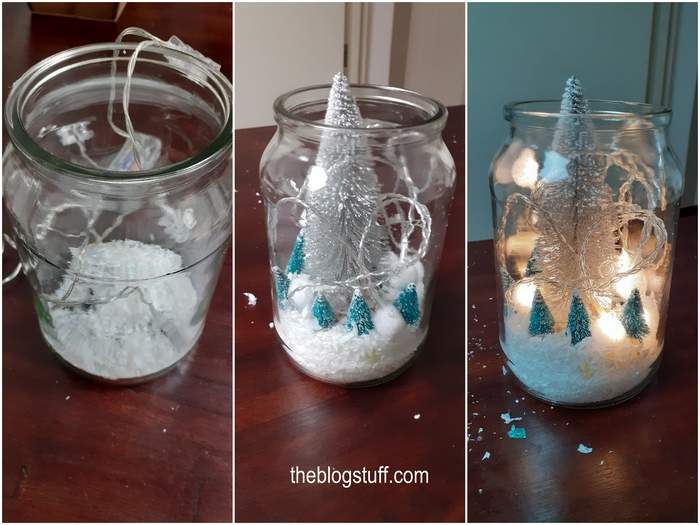
- Cut the edges off your flat square of Styrofoam to ensure it fits into the mason jar’s opening. To do this, place the mason jar’s mouth on it, upturn it, mark around the opening with a marker or a pencil, and cut off the excess. Reduce size just enough that it can be lowered into the jar.
- Place the piece of Styrofoam and stick your main tree into its center. Arrange the miniature Christmas trees around the main tree. Spread them apart from one another if needed. Most miniature plastic trees have pointy ends eliminating the need for you to sharpen them. This base will keep our trees standing and from wobbling around, misplacing all the other decorations.
- Using super glue or a glue gun, use a good amount on the bottom of the Styrofoam.
- Lower it down into the center of the mason jar. Hold it there for a few seconds and gently press into position.
- Put aside and let the glue dry.
- Drop faux snow into the jar, and fill up near the miniature trees’ leaves.
- Place the battery-operated fairy lights around the trees, gradually going up to the top as if swirling around them.
- If you are using a lid, close the jar now and tie a decorative bow around it.
- If you choose to have sentiments written, poke a hole through your stationery paper and loop the ribbon through.
1 (b). Mason Jar Lid Christmas Tree Decoration
A fun and easy way to decorate Christmas jam jars.
Materials
- glass jar with lid (I’m using a jam glass jar)
- faux snow
- miniature Christmas trees
- faux berries (optional)
- strong glue
Directions
Another easy way to decorate mason jars with Christmas trees is by using a lid.
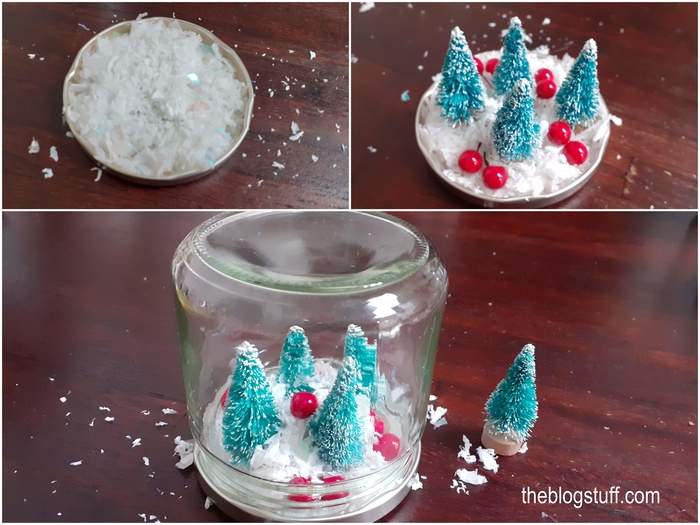
- Take the lid and place a good amount of glue on it.
- Cover the lid with artificial snow.
- Coat the bottom of the trees with glue and press them down into the lid until they feel secure.
- You can leave it like this or add more ornaments. I have added a few faux red berries.
- The last step is to put back the glass jar and close the lid.
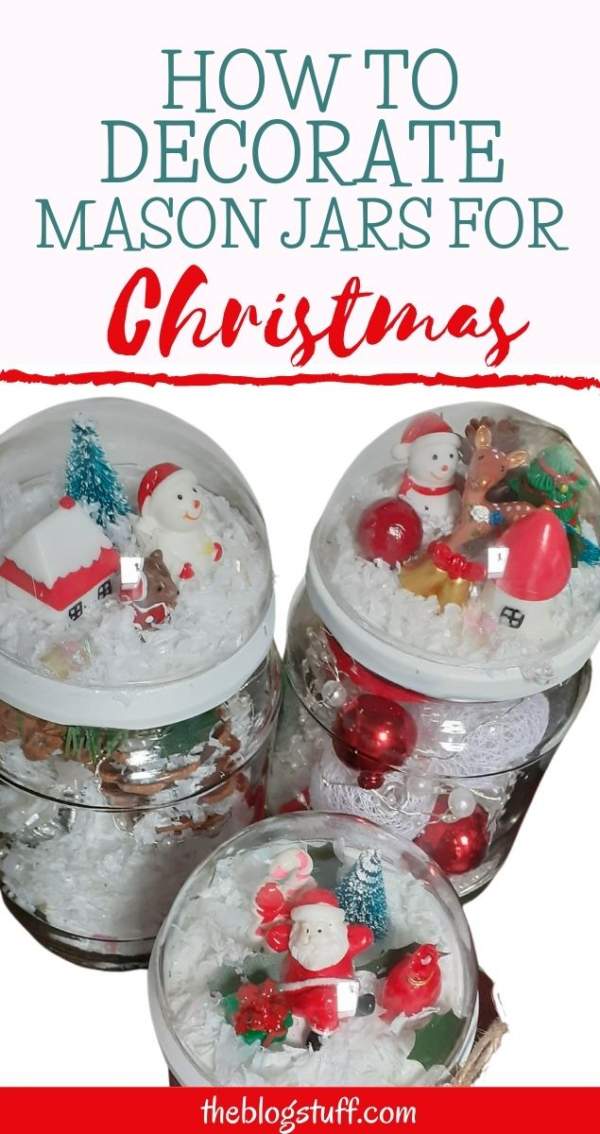
2. DIY Mason Jar Snow Globe (using the lid)
Anyone can make these cheap, fun, and easy snow globes for the holidays. Sure they will be a big hit and will be appreciated by the kids in your life or the inner child in you.
Materials
- Mason jars or glass jars
- clear Christmas tree baubles that snap in half
- Christmas themed miniatures
- fake snow
- battery-operated fairy lights (optional but very cute)
- Christmas ornaments or gifts to go inside the glass jars
- Christmas ribbon or twine string for a rustic look
- Christmas tags (if giving them as gifts)
- strong glue
- scissors
Directions
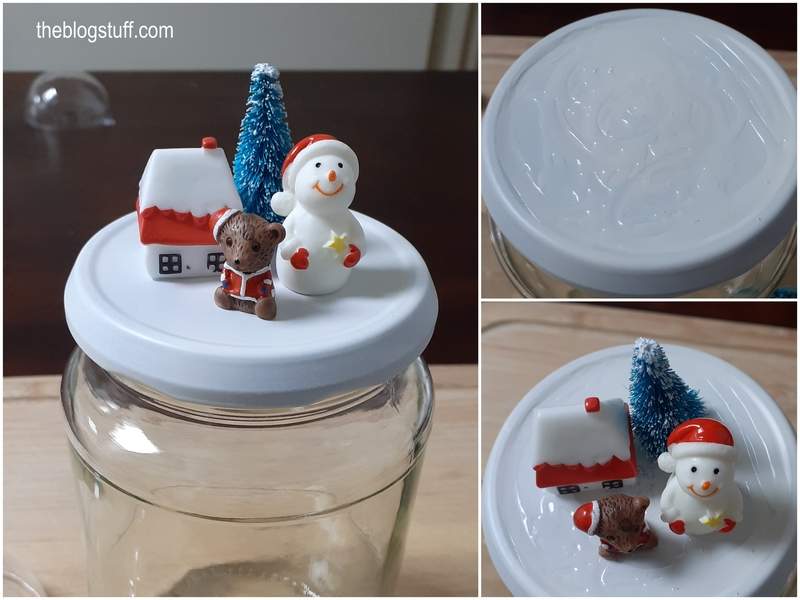
- I painted the lids in white color because they were black but you can leave them as they are.
- Cover the lid with plenty of glue.
- Glue different Christmas ornaments on top of the lid to create your own Christmas scene.
- Add some fake snow on top.
- Dust off any extra snow if necessary.
- Open up a clear plastic bauble and cover the rim of one-half with glue. Be sure to use a strong hold glue.
- Glue the half-bauble to the mason jar lid.
If you are giving the Mason jar snow globe as a gift insert a piece of string through the small gap and attach a gift tag.
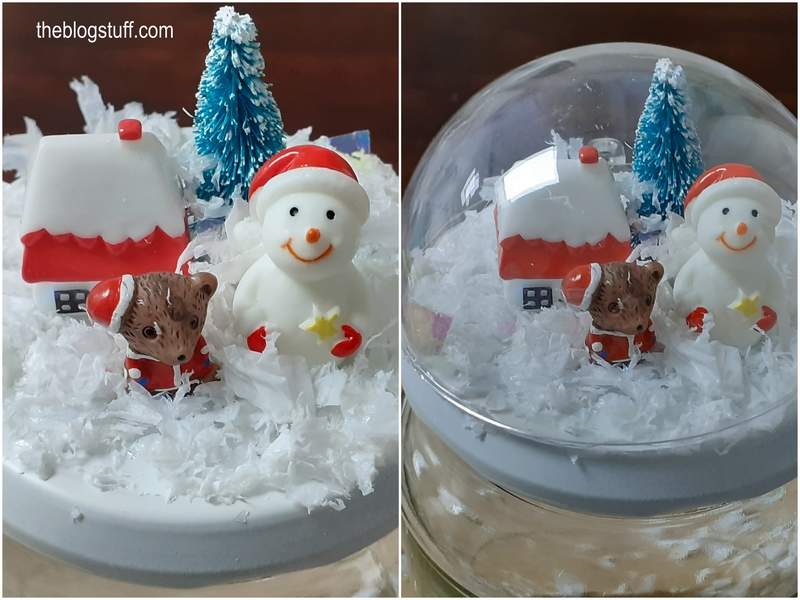
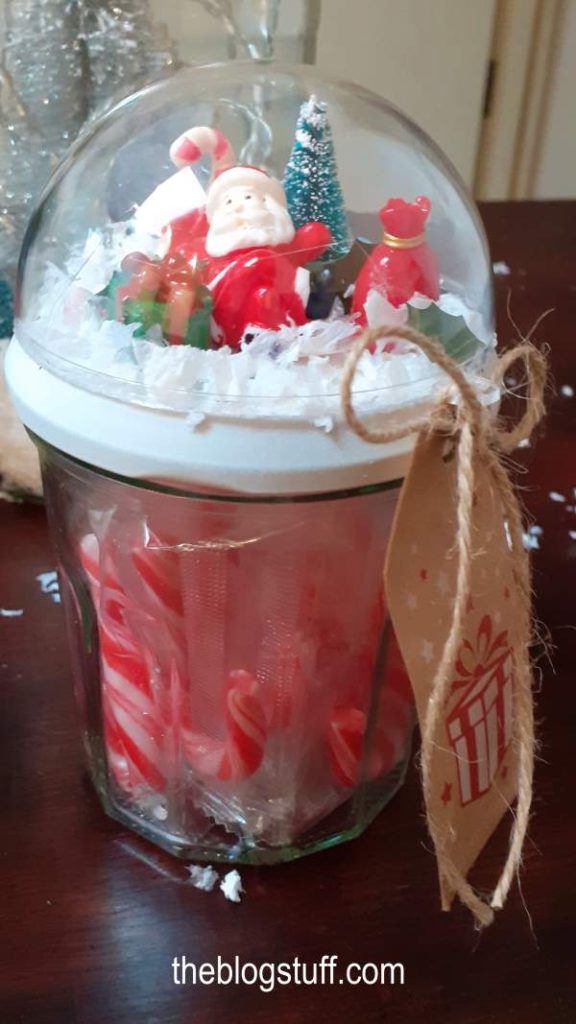
Place anything you want on the inside of the glass jar.
If you are wondering what to put in glass jars for decoration or gifts, here are 20 ideas:
- pinecones
- Christmas baubles
- faux berries
- Christmas figurines
- fake snow
- greenery
- faux candles
- dry flowers
- ribbon
- cotton
- fairy lights
- pictures
- wrapped chocolates
- wrapped biscuits
- marshmallows
- chocolate
- cocoa
- cinnamon sugar
- spiced nuts
- candy
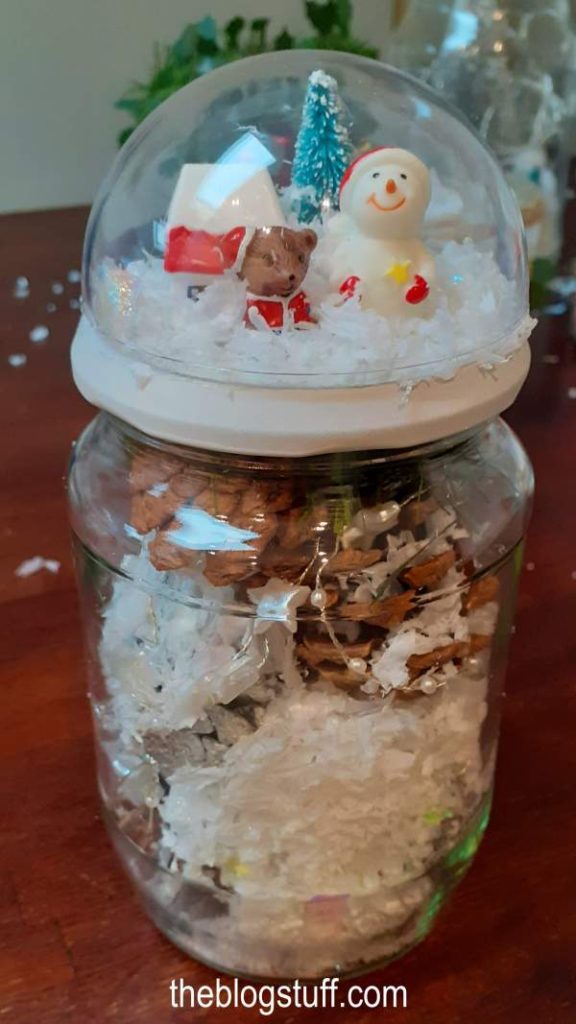
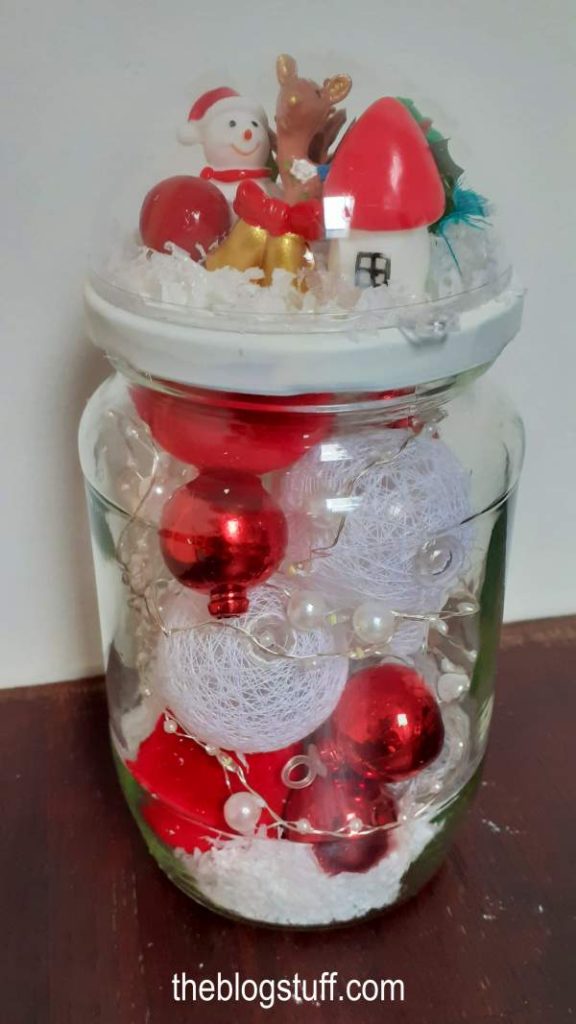
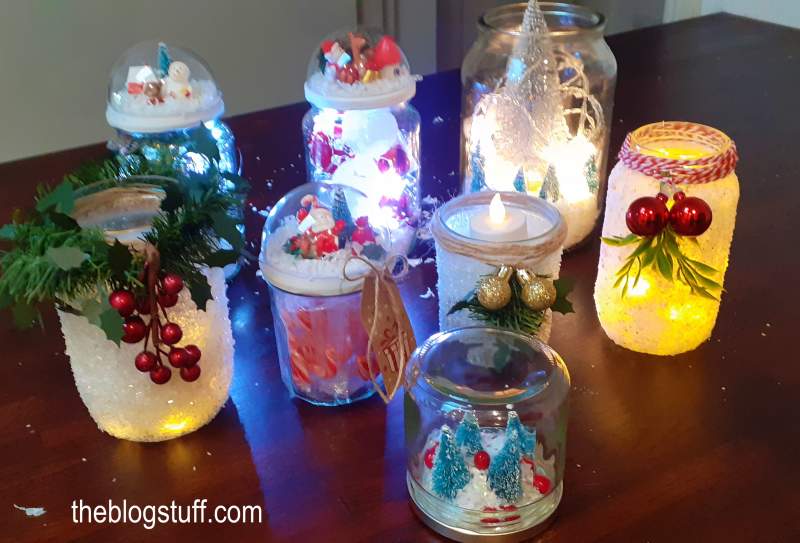
The Mason jars look really cute at night time with the fairy lights turned on.
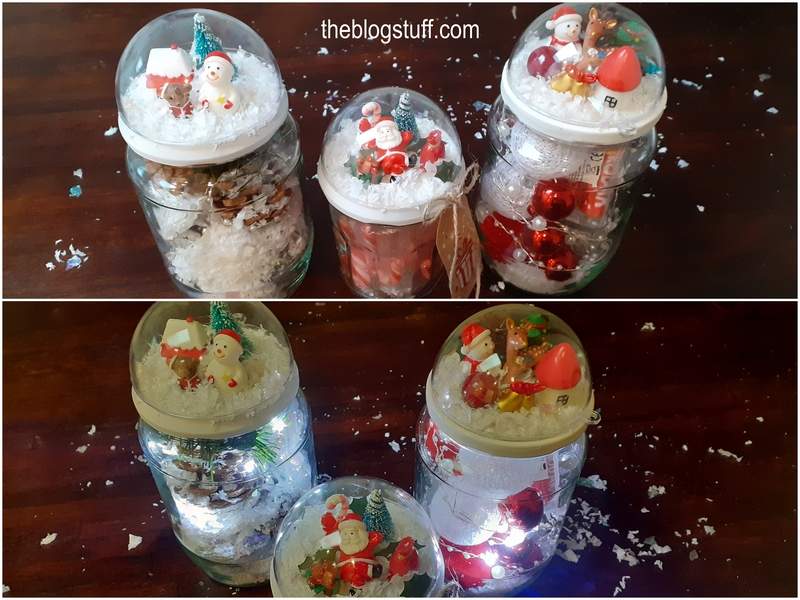
3. DIY Frosted Mason Jars
These frosted glass jars bring you Holiday-themed scented warmth and natural comfort lighting for that cold winter night. Beautiful!
Materials
- Mason Jars or glass jars
- Mod Podge
- a paintbrush or foam brush
- Epsom salt
- Krylon Clear Gloss Spray (optional)
- A flat surface to put the Epsom salts on
How to Make Them (step by step)
Most people use a plate when coating the jars, but you can also use a large flat bowl, a tray, or a large enough piece of cardboard.
The main thing you want to focus on is being able to evenly coat the jars, so whichever way makes the easiest for you is best.
- Coat Glass Jars With Mod Podge Or Glue
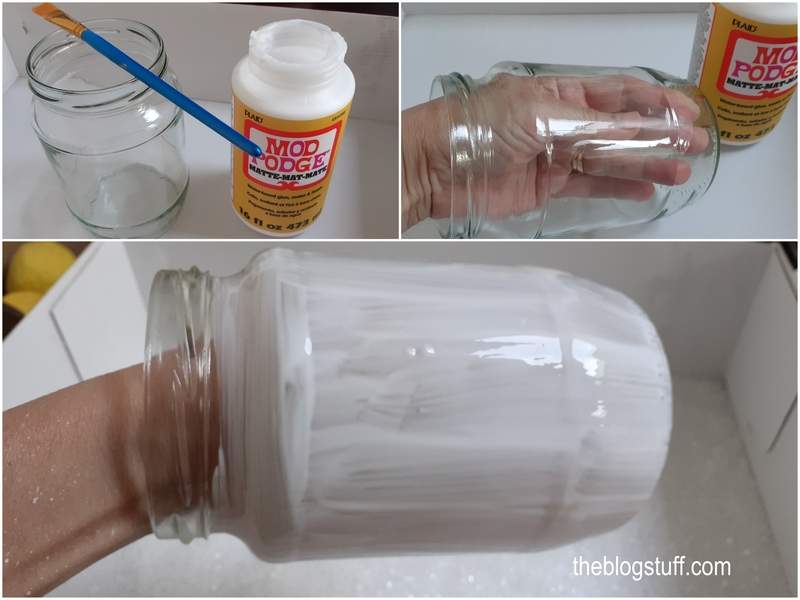
After you have the jars picked it’s time to paint the outside of the jar with Mod podge, you can find this glue on Amazon or at most stores that carry craft supplies.
You will want to make sure that the entire outside of the jars is completely coated with the glue, leaving just the rim uncoated.
Make sure to work quickly so the glue won’t have time to dry. This will prevent uncoated areas on your glass jars.
- Cover the Jars with Epsom Salt (or any other available salt)
I have used Epsom salts to cover the glass jars but you can use any type of salt from your kitchen.
Sea salt, Kosher salt, regular table salt, or even Himalayan salt (like in the image below) are good choices,
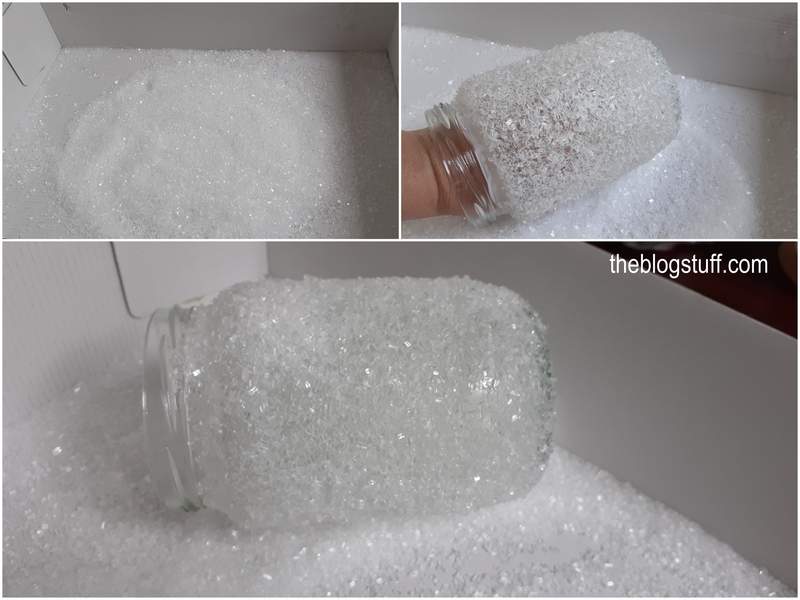
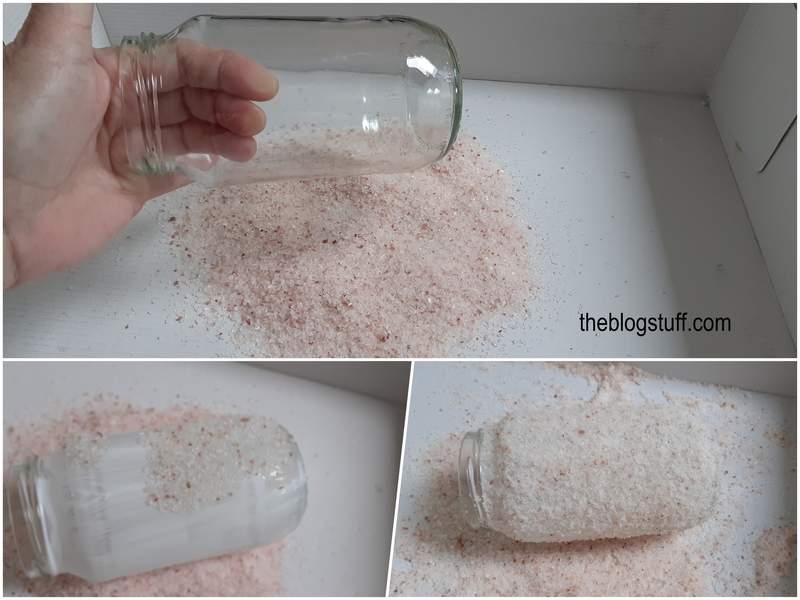
After you have covered the jars in glue, you need to do your best to coat the outside with the salt you are using.
I suggest keeping your fingers in the mouth of the jar and rolling it in the salt mixture.
Again, the idea is to get this as even as possible. If you have ever breaded chicken, it sort of reminds me of that.
Don’t worry too much if you have any bare spots, it sometimes happens. You could repeat the steps for that particular spot.
I didn’t coat the very top rim of the jars as I wanted to leave room to decorate it with a ribbon.
If you are not totally happy with the outcome, it is very easy to wash them and try again.
Maybe you need to add more glue or Mod Podge this time.
You would want to coat them as much as possible and then, allow them to totally dry.
I like to add the salt with my hands too and press down to make sure the salt is well attached to the jars.
Be sure to let the Mason jar dry all the way before you go lighting a candle or adding different decorations.
I only use flameless candles so I can leave the jars unattended.
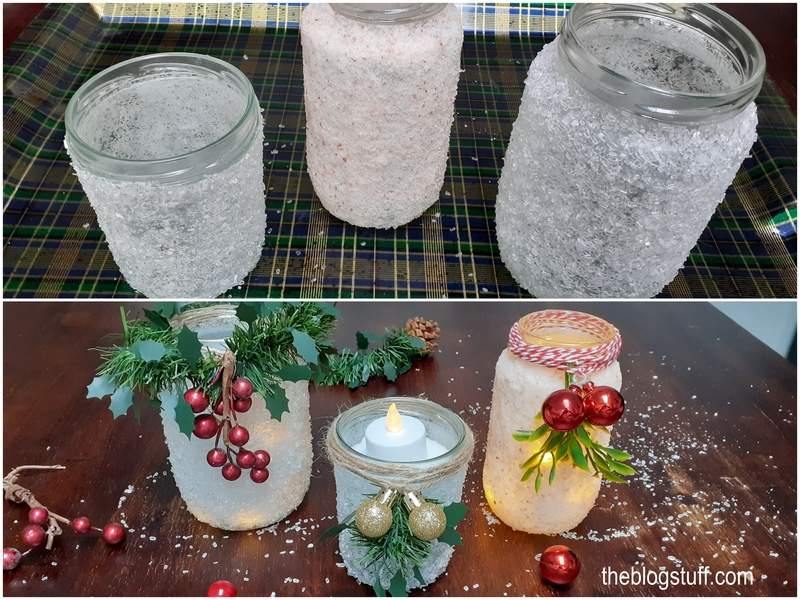
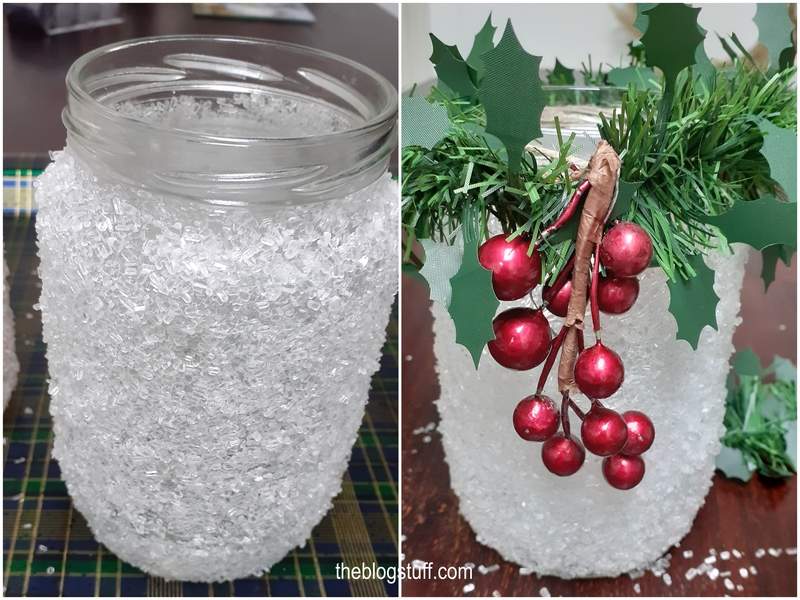
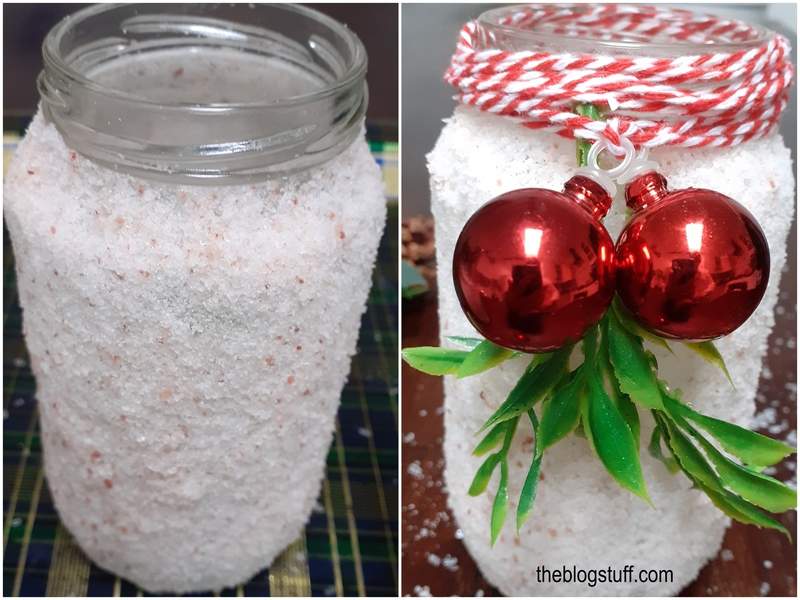
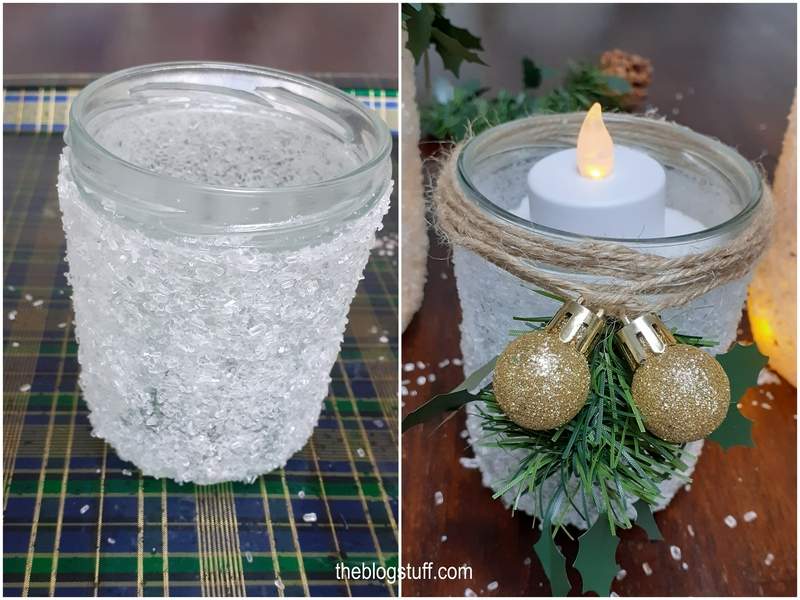
The one drawback to these DIY Epsom salt jars is that the salt will begin to lose moisture and degrade.
To prolong its life and prevent a yellowish appearance, you could use Crystal Clear Acrylic Spray. Spray from a distance, wait until it dries and you are done.
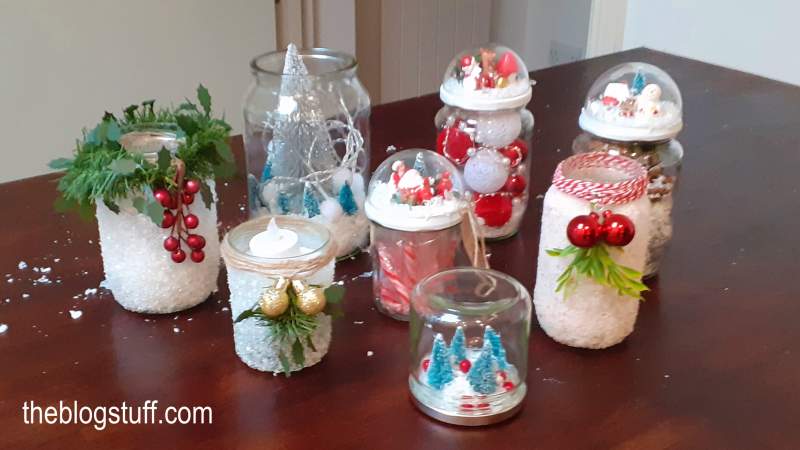
Nothing makes a place feel like home more than the personal touches you add to your living or working spaces.
Other DIY crafts you can make at home
- ways to fill clear Christmas ornaments
- easy DIY Christmas wreath
- Fall Mason jar decor (easy DIY project)
- seasonal home decorating crafts
Decorating Mason Jars For Christmas (Final Words)
Mason jars are a relatively inexpensive and simple way to decorate for the holidays.
For many of us, Mason jar decorating is a way of reflecting the spirit of the season. Fill them up with decorations, sweets, or treats and use them on shelves, windowsills, trays, or as a centerpiece with greenery and sparkling lights.
The most important thing is to be creative and if possible use what you have around the home.
Keep crafting!
